Search, monitor, and adjust backend configurations, full-text search indexing, user-tracker activity, scheduler/job queue management, plug-in upgrade history, geocoding queues, and vardef viewer.
User Guide
Prerequisites
System requirements for installation
Supported Versions
- 11.x (only supported by v1.0.0)
- 12.x
Supported Editions
- Sell
- Serve
- Enterprise
- Professional
Supported Databases
- MySQL
- MSSQL
- Oracle
- DB2
Supported Languages
- English
Overview
Upsert® Lens provides a detailed view of background data that was previously only available with database access, including:
- Admin Configurations
- Upgrade History
- Fields Metadata
- FTS Queue
- Job Queue
- Tracker Data
Upsert® Lens is available to administrative users.
Installation
Once you have completed your order for the Upsert® Lens plug-in, you should receive an email with instructions to download the necessary file. Once you obtain the file, complete these steps to install the plug-in to your Sugar instance:
- Log in to your Sugar instance as an admin user
- Go to Admin > Module Loader
- Select the Upsert® Lens ZIP file and click ‘Upload’
- Click the ‘Install’ button
- Review the license agreement, toggle the option to ‘Accept’, and click ‘Commit’
Once the installation completes, proceed to the Upsert® Lens configuration area.
Configuration
Once Upsert® Lens is installed, you will need to enter your license key to enable functionality on the Configurations page.
Configuring Upsert® Lens
Enable the functionality of the plugin via the following steps:
Validating the License
If access to the Upsert® Lens functionality is interrupted, you can manually validate your license via the following steps:
- Go to Admin, and select ‘Configuration Settings’ from the Upsert® Lens section
- In the right panel, click ‘Validate License’
- If successful, the status will be updated to ‘Enabled’ and the service start and end dates will be populated. If unsuccessful, there will be a message indicating the reason for the failure with further instructions. \ **Note: **The server hosting your Sugar instance must be able to reach https://upsertconsulting.com to successfully validate your license.
Navigation
All available lens sections can be accessed either through the Upsert® Lens area of the admin screen or through the Navigation Bar.
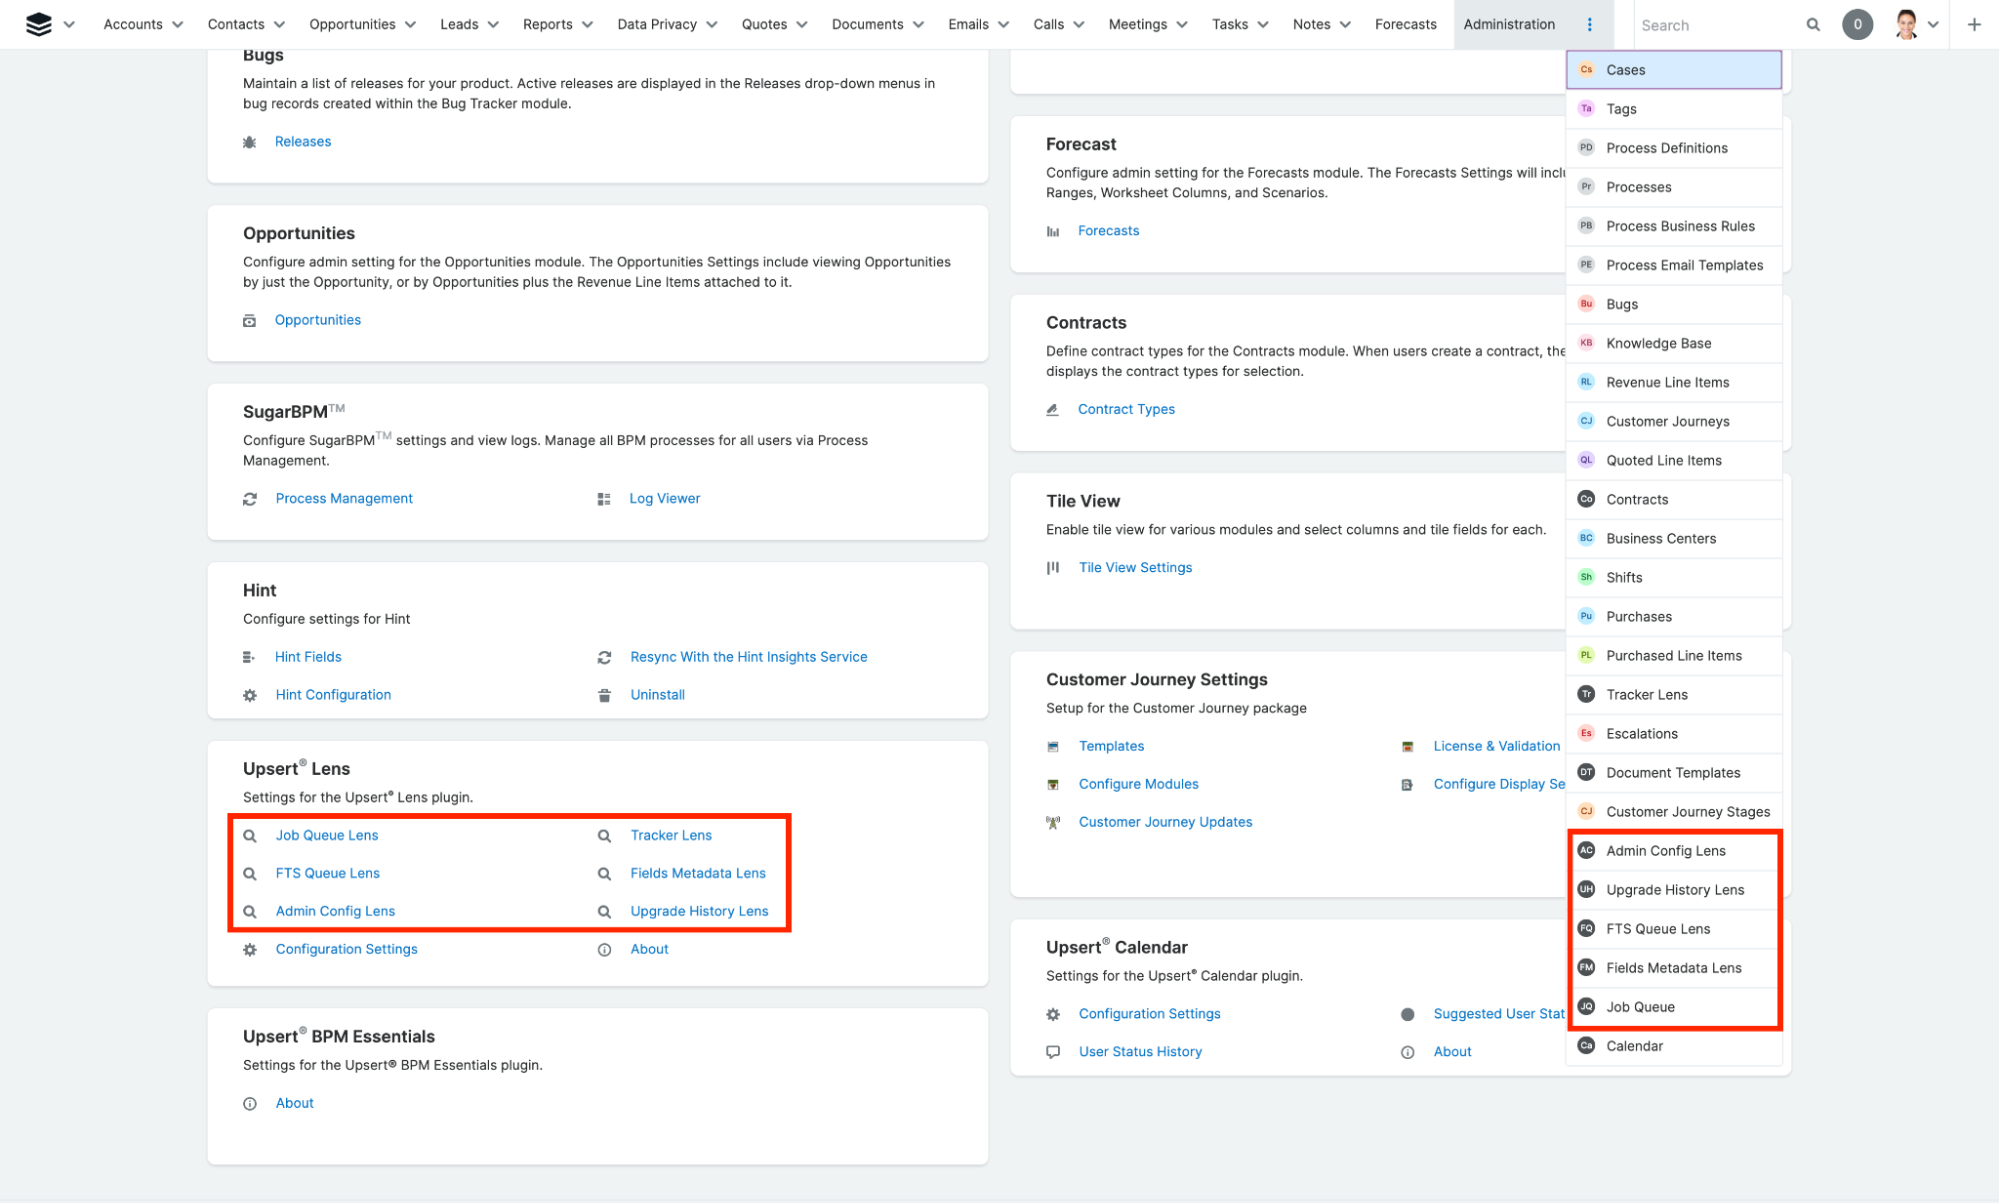
Admin Config Lens
The Admin Config Lens displays a detailed view of all configuration settings stored in Sugar’s config database table.

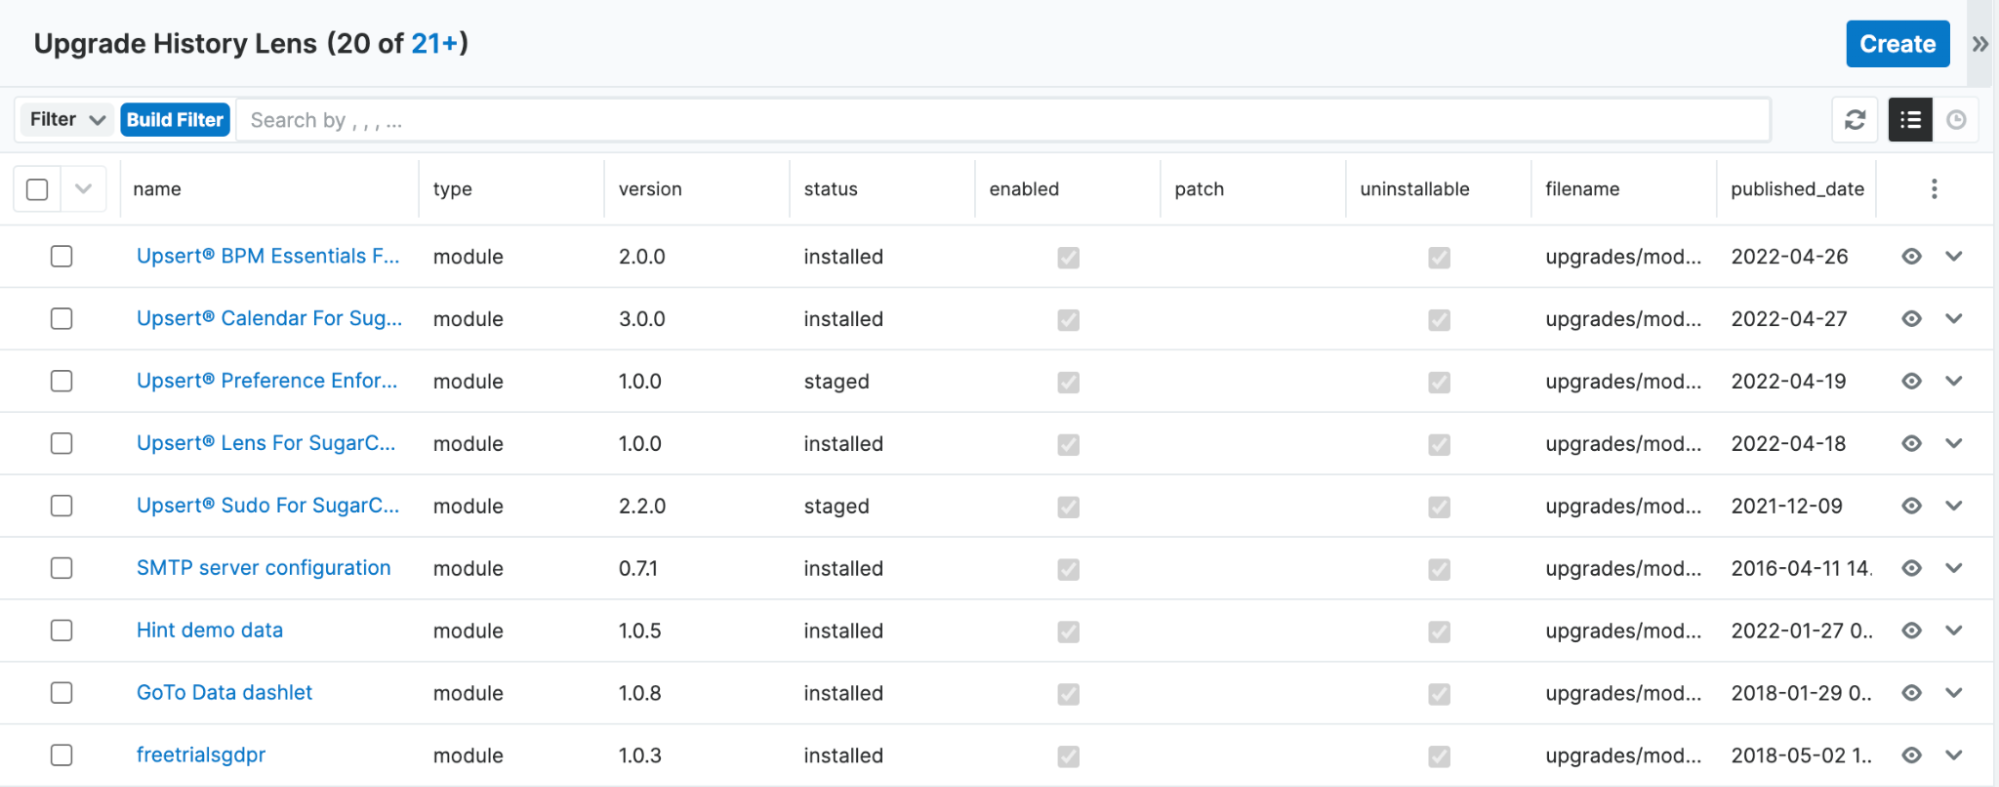
Upgrade History Lens
The Upgrade History Lens screen displays a detailed view of all the upgrades, patches, and module-loadable packages tracked through Sugar’s upgrade_history database table.
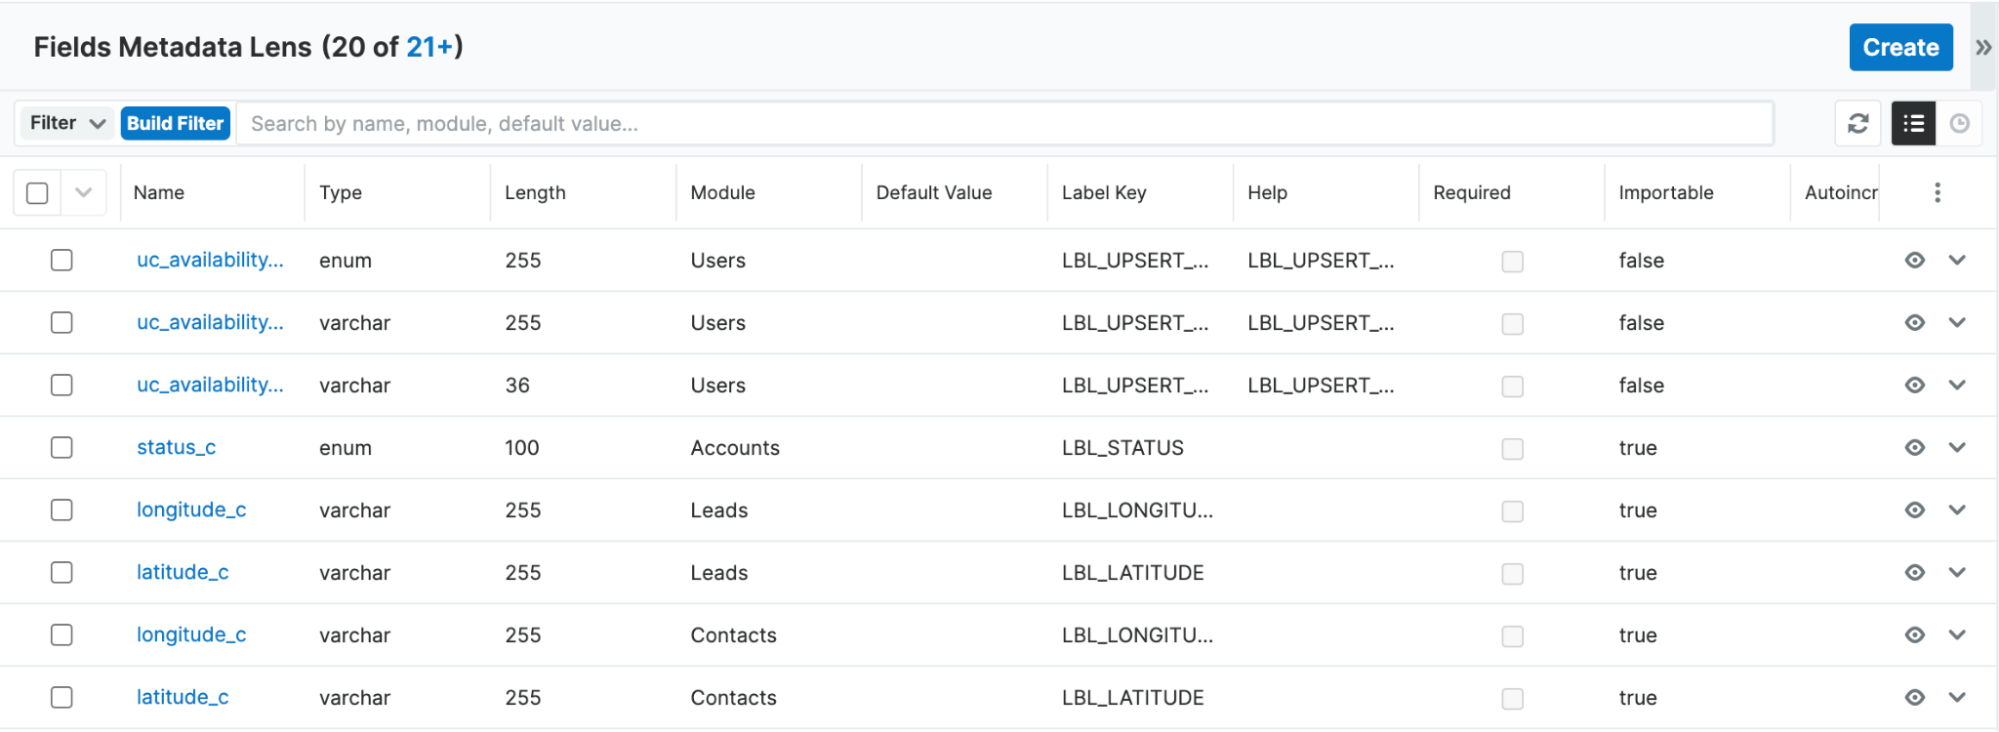
Fields Metadata Lens
The Fields Metadata Lens displays a more detailed list of Sugar fields than what can be found through Studio. Admin users have the ability to make necessary changes to the fields through this screen.
**Note: **A quick repair and rebuild will need to be run after making any changes to these records in order for Sugar to create the updated field definition.
FTS Queue Lens
The FTS Queue Lens displays the data waiting to be indexed from Sugar to Elasticsearch. Admin users can also create an index from this screen if they want to manually inject a record into Elasticsearch.

Creating an FTS Index
To create an FTS index:
- Go to Admin > Upsert® Lens > FTS Queue Lens
- Click ‘Create’
- Enter the module associated with the record needing to be processed into the ‘Bean Module’ field

- Enter the intended record’s Sugar ID into the ‘Bean ID’ field

- Click ‘Save’
Note: Items added to this queue are waiting to be processed. The ‘Processed’ checkbox will automatically update once that process is complete.
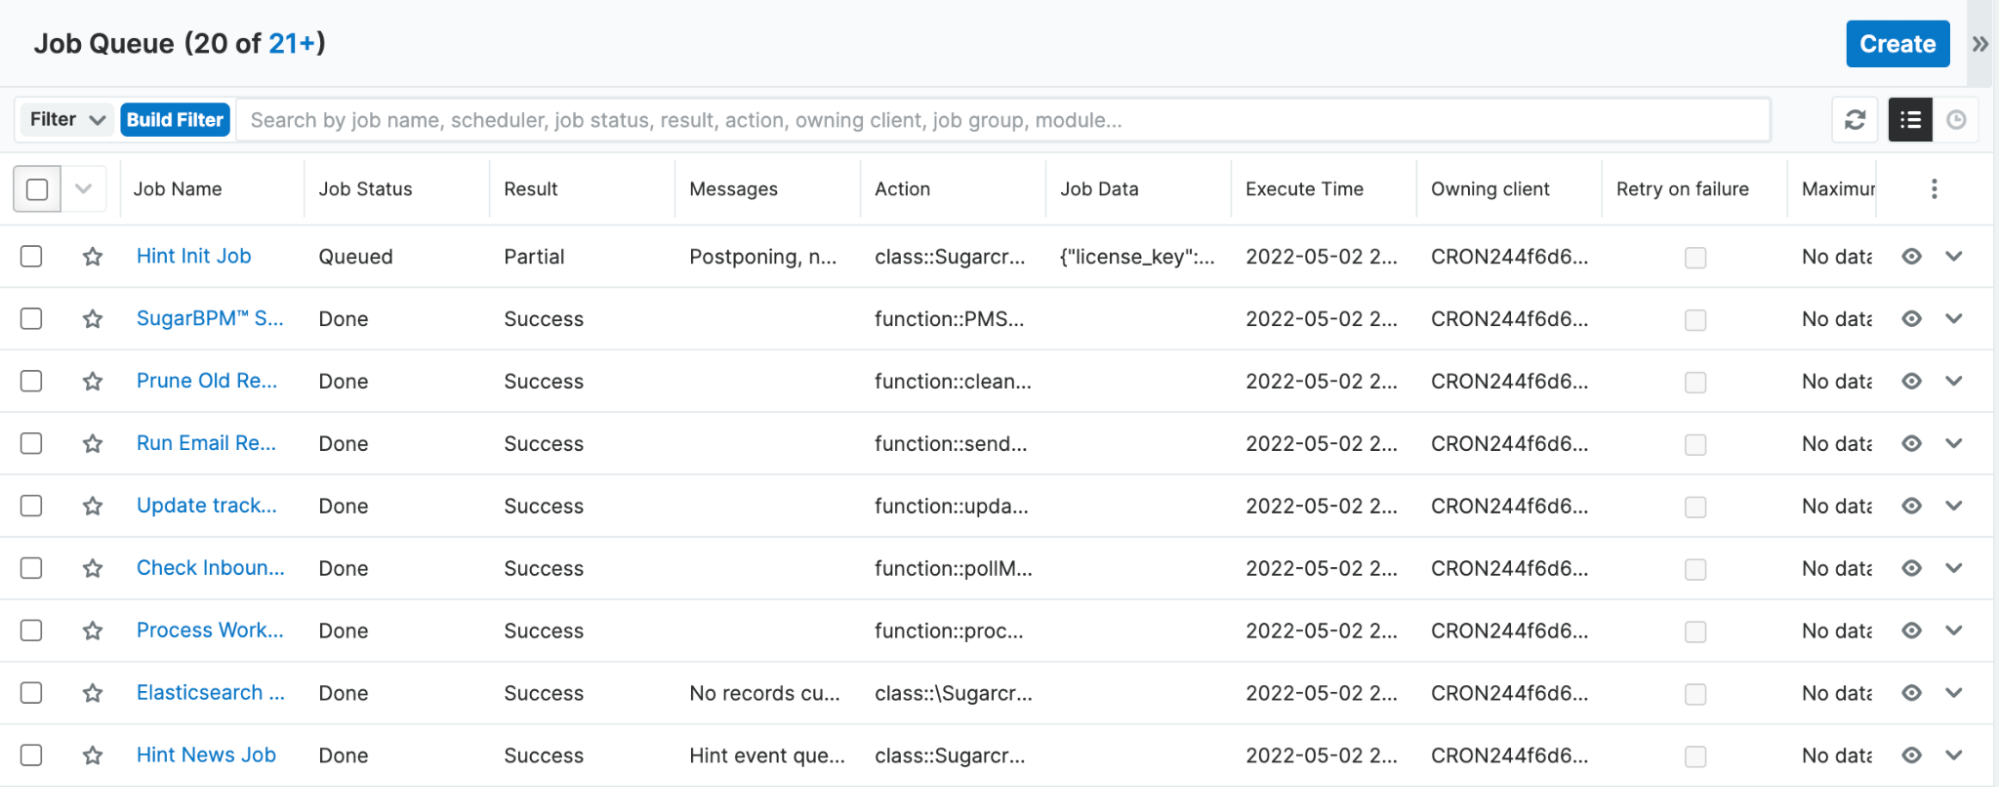
Job Queue Lens
The Job Queue Lens displays all automated tasks that have either been processed or are waiting to be executed through a scheduler.
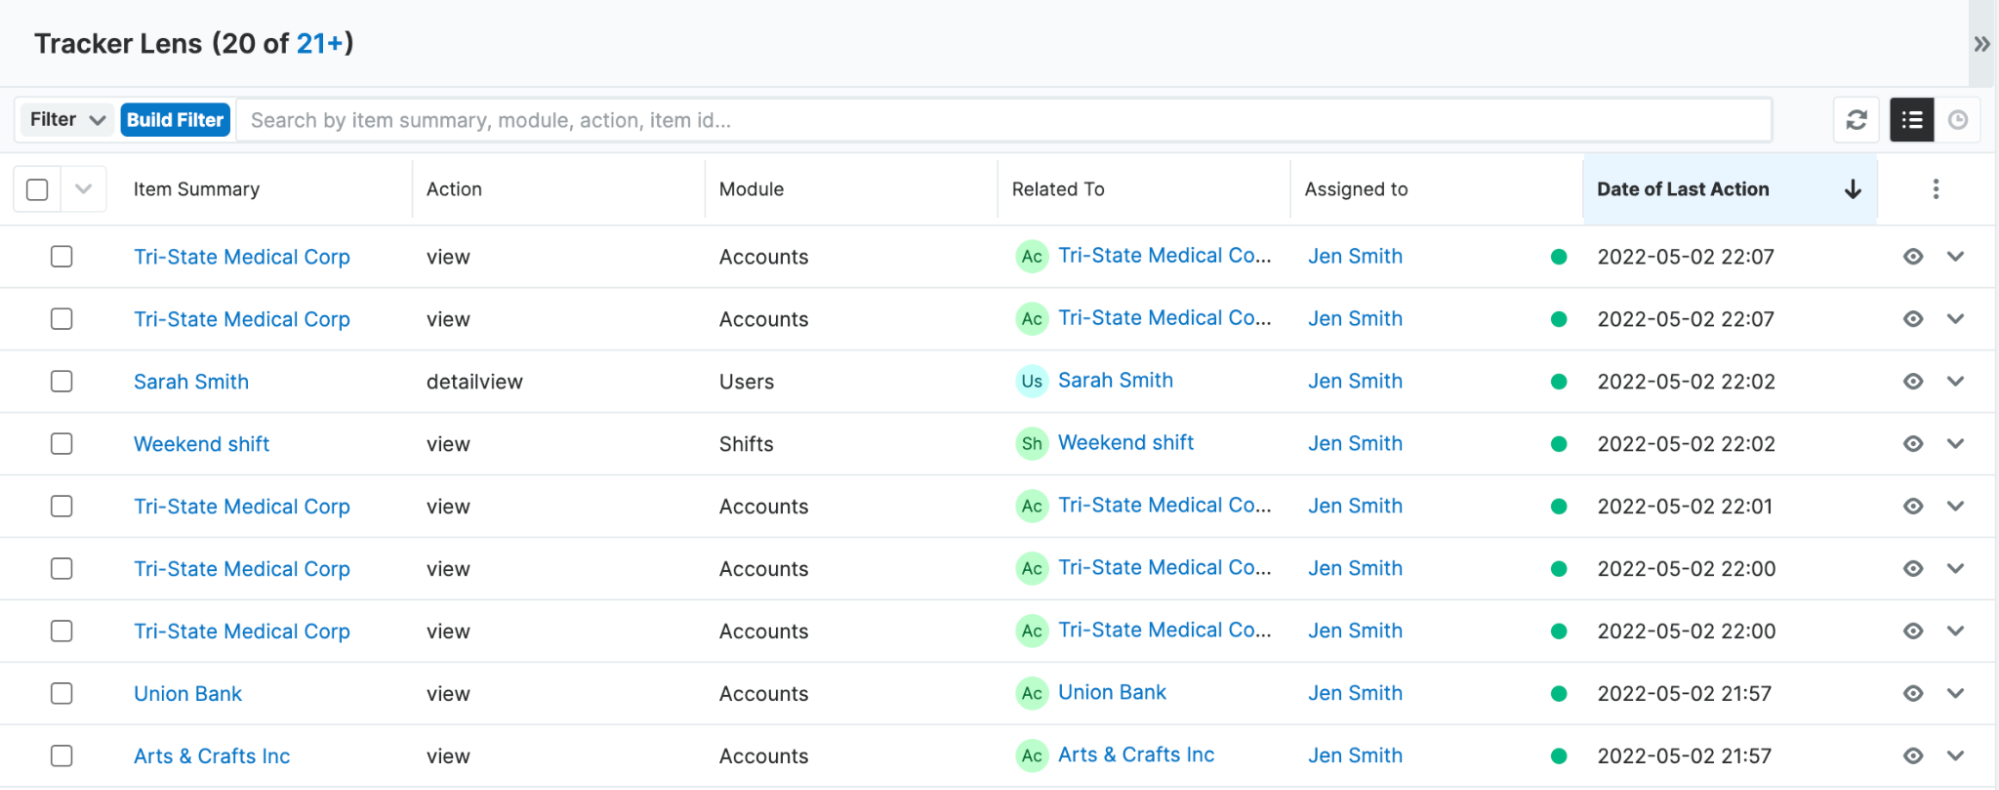
Tracker Lens
The Trackers Lens displays an overview of user productivity and system efficiency. They monitor the frequency of users' record-save actions and page views. This information can be obtained through reporting, but becomes more easily accessible through the Upsert® Lens feature.
Uninstalling the Plug-In
Follow the steps below to remove the plug-in from your Sugar instance.
- Log in to your Sugar instance as an admin user
- Go to Admin > Module Loader
- Locate the ‘Upsert® Lens for SugarCRM’ package in the list of installed packages and click ‘Uninstall’
- Select the desired option for handling the related database tables:
- Do Not Remove Tables - You either want to upgrade the plug-in to a newer release or you want to retain the lockout audit log data.
- Remove Tables - You want all data associated with the plug-in to be deleted and you have no intention of upgrading.
- Click ‘Next’
The uninstall will process and provide confirmation upon successful completion.