User Guide
System requirements for installation
Supported Versions
- 9.x
- 10.x
- 11.x
- 12.x
Supported Editions
- Sell
- Serve
- Enterprise
- Professional
Supported Databases
- MySQL
- MSSQL
- Oracle
- DB2
Supported Languages
- English
Overview
Upsert Lockout is an administrative tool that ensures administrative users make system altering changes or run time-consuming system processes at designated times within Sugar such as:
- Module modifications via Studio
- Editing dropdown lists
- Running repair functions
- Building and deploying custom modules
- Installing packages via Module Loader
A lot of these changes can cause Sugar to rebuild files and force active users to be logged out and thus lose their work. This tool provides stability for a critical business application throughout the work day for your users. Upsert Lockout configuration is only available to users with a user type of ‘System Administrator User’ and applies to any user who has access to the administration sections of Sugar either as an administrator or with role privileges.
Installation
Once you have completed your order for the Upsert Lockout plug-in, you should receive an email with instructions to download the necessary file. Once you obtain the file, complete these steps to install the plug-in to your Sugar instance:
- Log in to your Sugar instance as an admin user
- Go to Admin > Module Loader
- Select the Upsert Lockout ZIP file and click ‘Upload’
- Click the ‘Install’ button
- Review the license agreement, toggle the option to ‘Accept’, and click ‘Commit’
Once the installation completes, proceed to the ‘Configuring Upsert Lockout’ section.
Configuration
Once Upsert Lockout is installed, you will need to enter your license key and configure other settings to begin using the plug-in.
Configuring Upsert Lockout
The Configurations page consists of the following fields:
- Licenses - The license keys used to access the plugin
- Status - Whether or not the lockout system is enabled
- Lockout Administrators - Sugar admin users that are able to edit, delete, and bypass locks and create maintenance windows
Enable the functionality of the plugin via the following steps:
- Go to Admin, and select ‘Configuration Settings’ from the Upsert Lockout section

- Enter your license key that you received via email from your initial purchase Note: If you installed and configured other Upsert plug-ins, the license key will pre-populate into this screen and not require re-entry
- Set the status to ‘Enabled’ when you are ready to enable any active locks.
- Add desired ‘Lockout’ Administrators’. This group may be a subset of administrative users with the additional ability to bypass locks and maintain maintenance windows.
Validating the License
If access to the Upsert Lockout functionality is interrupted, you can manually validate your license with the following steps:
- Go to Admin, and select ‘Configuration Settings’ from the Upsert Lockout section
- In the right panel, click ‘Validate License’
- If successful, the status will be updated to ‘Enabled’ and the service start and end dates will be populated
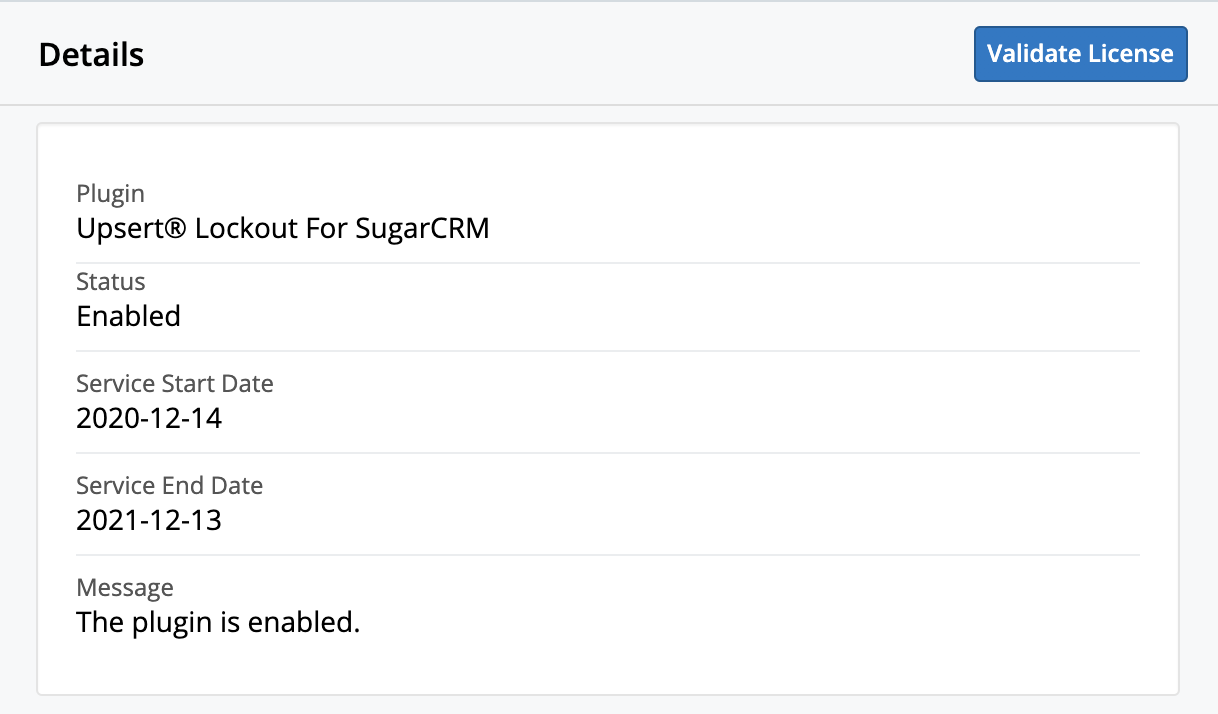 If unsuccessful, there will be a message indicating the reason for the failure with further instructions.
Note: The server hosting your Sugar instance must be able to reach https://upsertconsulting.com to successfully validate your license.
Locks
The Upsert Lockout package comes with predefined locks for specific administrative actions. Any Sugar admin user can edit, delete, or bypass locks and create maintenance windows. To manage locks, navigate to Admin and select ‘Locks’ in the Upsert Lockout section

Field Listing
| Field Name | Description |
|---|---|
| Status | Enable or disable the specified lock to determine whether users can access the admin feature |
| Request Type | Type of request the Admin lock is (non-editable). Available options are currently: BWC, API, Sidecar, and Redirect |
| URL | Relative URL path for the lock (non-editable) |
| Description | A brief description of the action the lock prevents |
| Parent Lock | The parent lock of the lock being viewed (non-editable) |
Enabling/Disabling Locks
The Upsert Lockout package comes with pre-made locks. These locks will all have an ‘Enabled’ Status field by default, except for the following:
- Administration > Scheduler
- Administration > Log Viewer
- Administration > Styleguide (Lab)
To enable or disable a lock:
- Log in to Sugar as an admin user
- Go to Admin, and select ‘Locks’ from the Upsert Lockout section
- Select the lock you would like to enable/disable
- In the lock’s record view, Click ‘Edit’ in the top right
- Select the desired status

- Click ‘Save’ in the top right
Bypassing Locks
In certain situations, the need may arise to perform an action outside of a maintenance window. Because of this, Sugar admin users that are included in the list of Lockout Administrators can bypass locks. For more information on enabling Lockout Administrators, please refer to the ‘Configuring Upsert Lockout’ section.
To bypass a lock:
- Start by initiating the action as you normally would if it were not locked
- If the action is locked, Sugar displays a message stating that the action you are trying to perform is currently locked with a button below labeled ‘Bypass Lock’
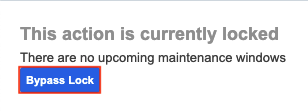
- Click the ‘Bypass Lock’ button
- An alert will appear asking you to confirm that you want to bypass the lockout
- Click ‘Confirm’
- You are now able to perform the action that was locked Note: The bypass will only be in effect for 1 hour.
Creating Missing Locks
The situation may arise where a lock that came out-of-box with the Upsert Lockout package has been deleted and you wish to reinstate it.
To create missing locks:
- Go to Admin, and select ‘Create Missing Locks’ from the Upsert Lockout section

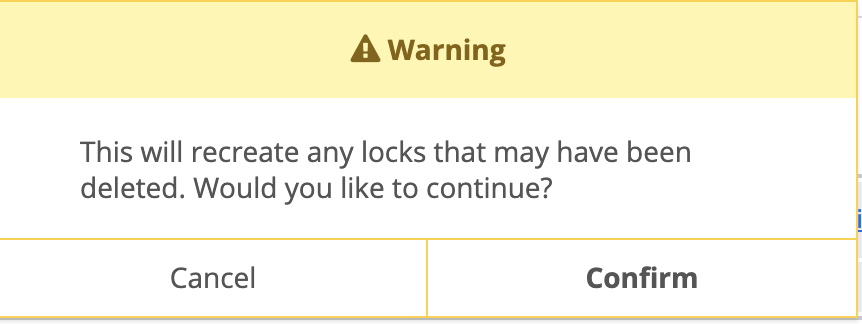
- An alert will appear to confirm you would like to recreate any deleted locks
- Click ‘Confirm’
 Notes:
- This will not update existing locks if they have been modified since installation.
- This will not restore any custom locks made by users that have been deleted.
Maintenance Windows
Maintenance windows offer administrators the ability to unlock certain administrative actions for a specified period of time on a scheduled basis.
Field Listing
| Field Name | Description |
|---|---|
| Name | The name given to identify the Maintenance Window |
| Time Zone | The time zone the maintenance window adheres to |
| Status | Enable or disable the maintenance window for any related locks |
| Interval | The time the maintenance window will open and how often the window will recur |
| Duration | The amount of time the maintenance window will stay open |
| Next Opening | The next date and time the maintenance window will open |
| Description | A brief description of the maintenance window |
Creating Maintenance Windows
To implement a maintenance window for a lock:
- Go to Admin, and select ‘Locks’ from the Upsert Lockout section

- Select the lock for which you would like to create a maintenance window
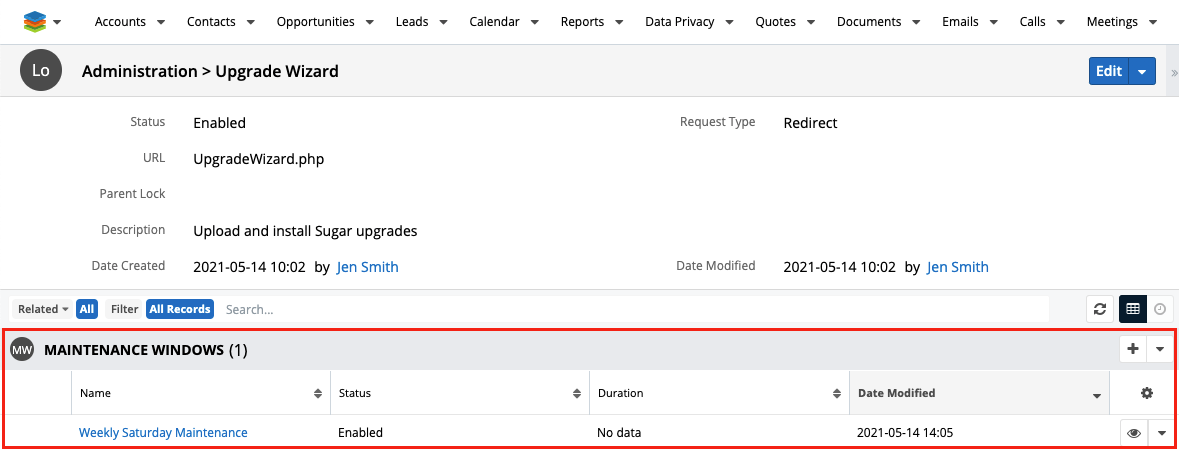
- In the lock’s record view, click the ‘+’ icon in the Maintenance Windows subpanel
- Fill in the fields for the time and duration you would like the maintenance window to open
- Click ‘Save’ in the top right
- Your new maintenance window will appear in the Maintenance Windows subpanel
Adding Additional Locks to a Maintenance Window
Instead of creating individual Maintenance Windows, additional locks can be added to a pre-existing Maintenance Window. This is beneficial when multiple locks all require similar restrictions.
- Go to Admin, and select ‘Maintenance Windows’ from the Upsert Lockout section

- Select the existing Maintenance Window

- In the Maintenance Window record view, click the subpanel action menu in the Locks subpanel and select “Link Existing Record”
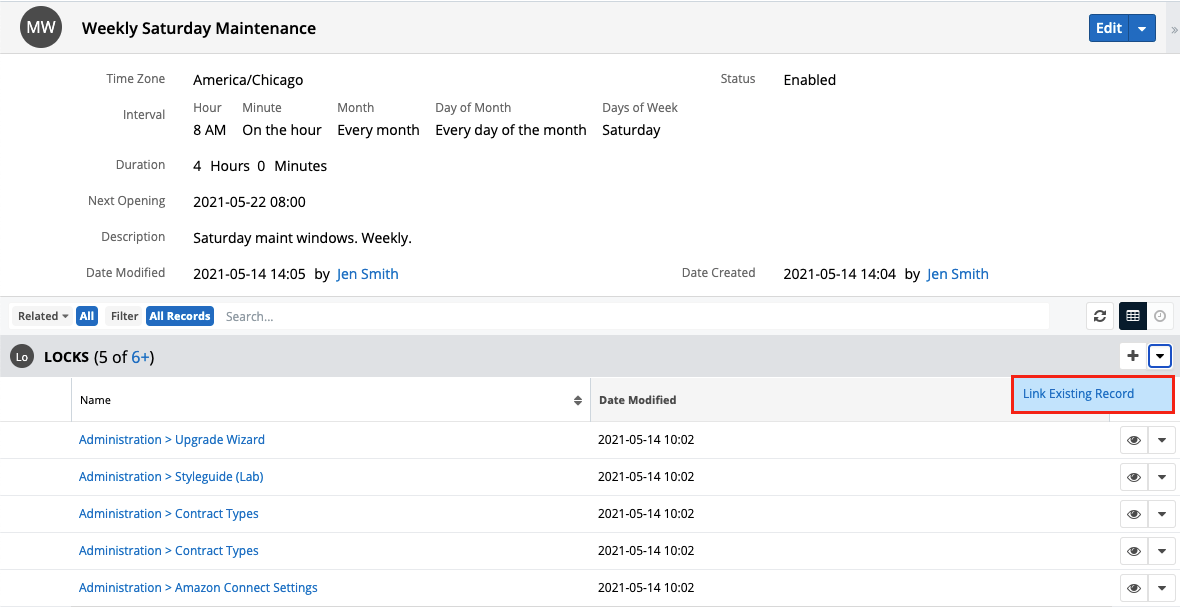
- From the search list, select multiple or search for a specific Lock to add to the Maintenance Window
- Click “Add” at the top right once the selections are complete
Viewing Upcoming Maintenance Windows
To view all upcoming maintenance windows:
- Go to Admin, and select ‘Upcoming Maintenance Windows’ from the Upsert Lockout section

- Select the lock for which you would like to check the maintenance window
- Click the record view action menu and select ‘Upcoming Maintenance Windows’

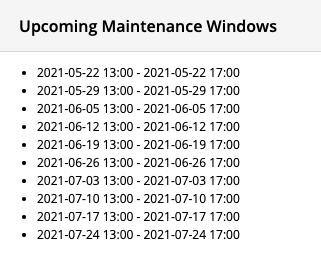
- The next 10 upcoming maintenance windows for the lock will be displayed with the date and time the window will open and close
Viewing the Next Occurrence for a Specific Maintenance Window
To view the next occurrence for maintenance window:
- Go to Admin, and select ‘Maintenance Windows’ from the Upsert Lockout section

- Select the Maintenance Window record you would like to review
- The ‘Next Opening’ field will display the next date and time the window will open

Uninstallation
Follow the steps below to remove the plug-in from your Sugar instance.
- Log in to your Sugar instance as an admin user
- Go to Admin > Module Loader
- Locate the ‘Upsert Lockout for SugarCRM’ package in the list of installed packages and click ‘Uninstall’
- Select the desired option for handling the related database tables: a. Do Not Remove Tables - You either want to upgrade the plug-in to a newer release or you want to retain the lockout audit log data. b. Remove Tables - You want all data associated with the plug-in to be deleted and you have no intention of upgrading.
- Click ‘Next’
The uninstall will process and provide confirmation upon successful completion.


