User Guide
System requirements for installation
Supported Versions
- 9.x
- 10.x
- 11.x
- 12.x
Supported Editions
- Sell
- Serve
- Enterprise
- Professional
Supported Databases
- MySQL
- MSSQL
- Oracle
- DB2
Supported Languages
- English
Overview
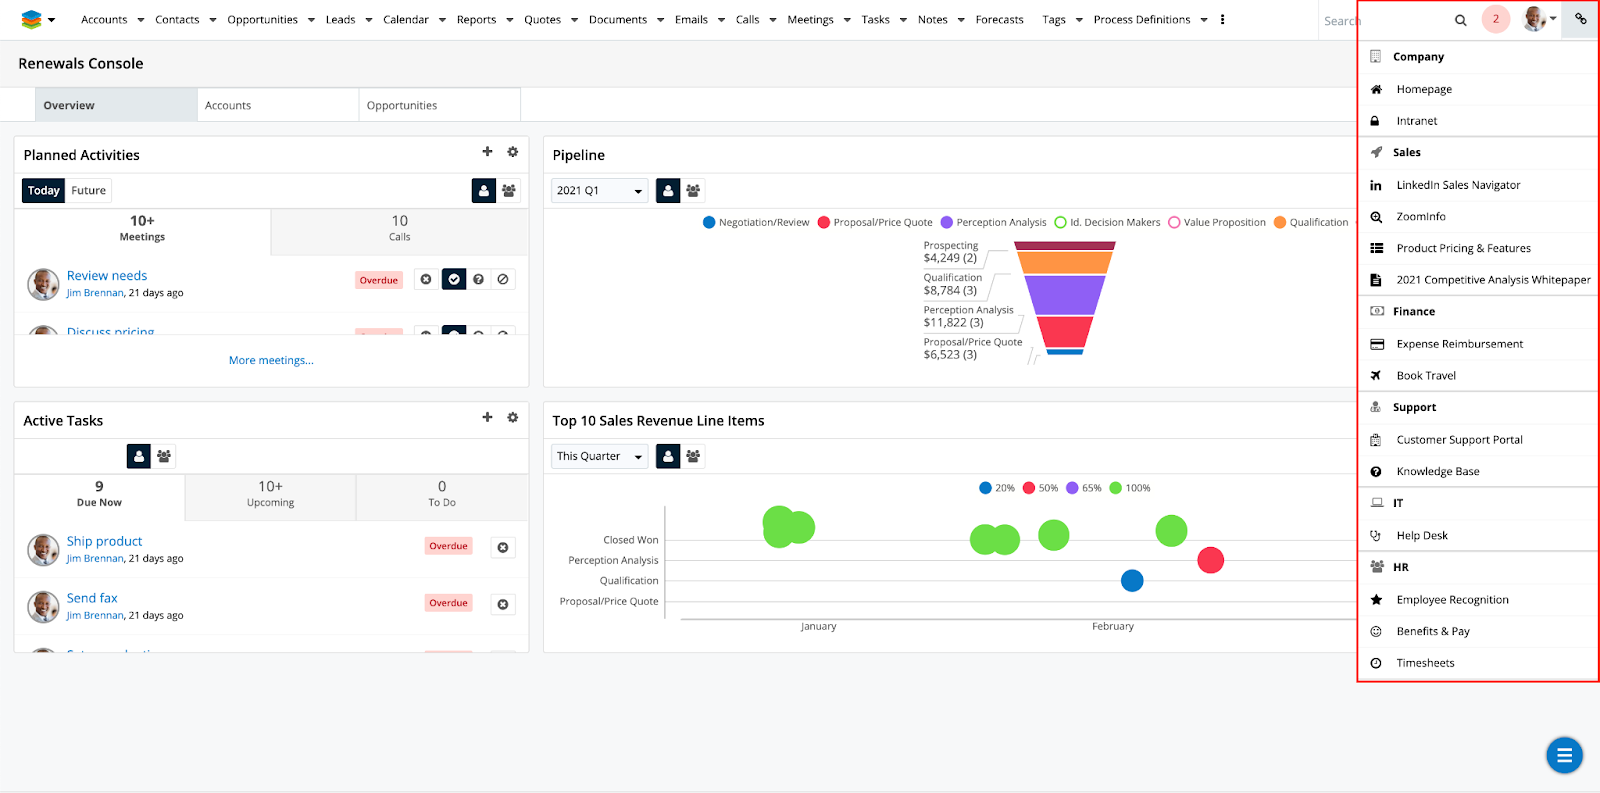
Upsert LaunchPad is a plug-in that Sugar admins can configure to provide their users a tailored menu to access business-critical applications and resources. LaunchPad uses Sugar’s team and role-based security model as well as each user’s language preferences to help deliver a useful utility that reinforces Sugar as the hub of day-to-day business.
Installing the Plug-In
Once you complete your order for the Upsert LaunchPad plug-in, you should receive an email with instructions to download the necessary file. Complete these steps to install the plug-in to your Sugar instance:
- Log in to your Sugar instance as an admin user
- Go to Admin > Module Loader
- Select the Upsert LaunchPad ZIP file and click ‘Upload’
- Click the ‘Install’ button
- Review the license agreement, toggle the option to ‘Accept’, and click ‘Commit’
- Once installed, you will see a link icon in the top right corner of the application next to your avatar

Once the installation completes, proceed to the ‘Configuring Upsert LaunchPad’ section.
Configuring Upsert LaunchPad
Once Upsert LaunchPad is installed, you will need to enter your license key to enable functionality via the following steps:
- Go to Admin, and select ‘Configuration Settings’ from the Upsert LaunchPad section

- Enter your license key that you received via email from your initial purchase Note: If you installed and configured other Upsert plug-ins, the license key will prepopulate into this screen and not require re-entry
- Choose what Sugar environment environment LaunchPad is installed to
- Choose whether you want to display the standard Sugar Quick Create menu in addition to the LaunchPad menu. Our recommendation is to leave the Quick Create menu disabled since it is an inconsistent experience when compared to creating some records through other methods (e.g. subpanels).
- Click ‘Save’
Validating the License
If access to Upsert LaunchPad functionality is interrupted, you can manually validate your license with the following steps:
- Go to Admin, and select ‘Configuration Settings’ from the Upsert LaunchPad section
- In the right panel, click ‘Validate License’
- If successful, the status will be updated to ‘Enabled’ and the service start and end dates will be populated
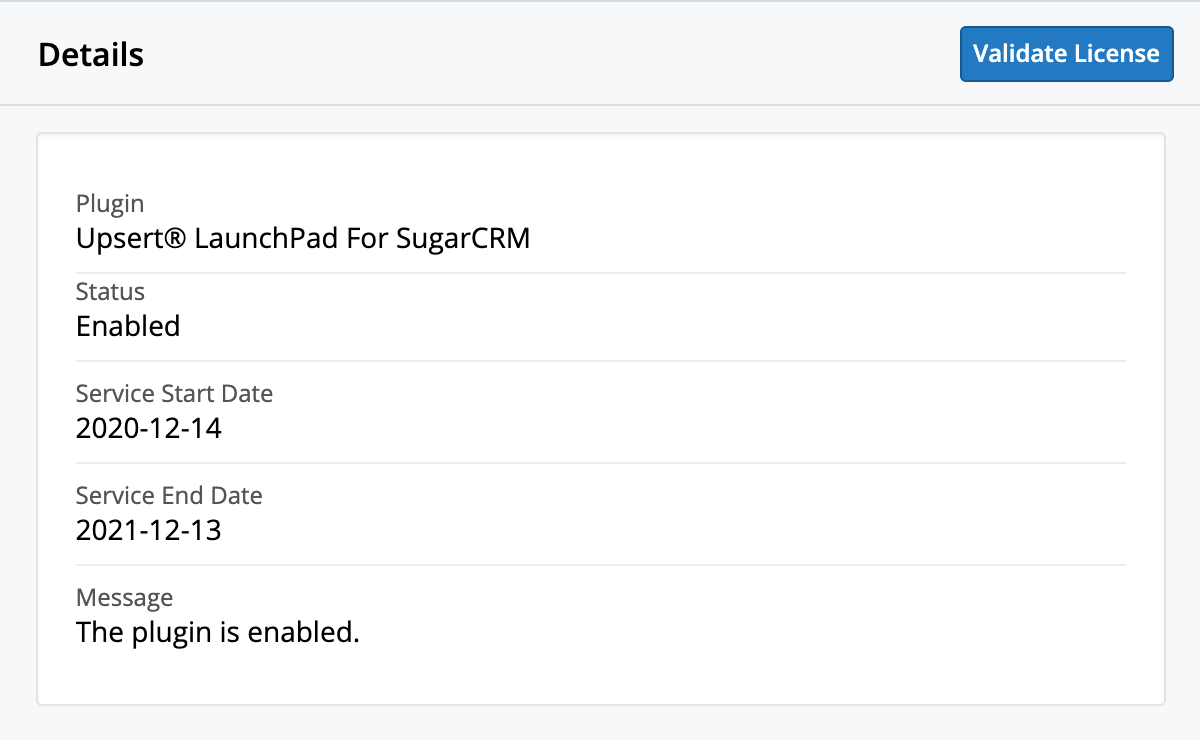
If unsuccessful, there will be a message indicating the reason for the failure with further instructions. Note: The server hosting your Sugar instance must be able to reach https://upsertconsulting.com to successfully validate your license.
Creating LaunchPad Menus
LaunchPad menus consist of two elements: categories and items. Categories serve as different groupings that contain items. Categories can be used to help group different items by department, job function, etc.
Using Team & Role-Based Security
All LaunchPad menus are governed by team and role-based security. Each category and item can be associated with teams and/or roles that should have visibility to the record. Since categories contain items, a user must have the appropriate rights to view the category in order to view any items within that category. If a category or item has both roles and teams associated with it, then the user must belong to at least one of the roles and teams on that LaunchPad record in order to view it in the LaunchPad menu.
LaunchPad differentiates from Sugar’s traditional team and role security in that admin users must belong to roles and teams associated with a LaunchPad item to view it. This is done to ensure that admin users can have a helpful LaunchPad menu for their day-to-day work rather than a menu consisting of the items for every employee.
Here are a few examples of how you could use the role and team-based security with LaunchPad categories and items:

Associating Icons With Categories and Items
When creating LaunchPad categories and items, you have the option to select an icon to appear to the left of the text in the LaunchPad menu. LaunchPad icons are derived from the Font Awesome library included with the core Sugar product; you can view all possible icons by going to Admin > Styleguide (Lab) > Core UI Elements > Icons.
Creating LaunchPad Categories
Once you are ready to start building your LaunchPad menu, create categories as at least 1 category is required before you can create any LaunchPad items. Please note that a category will not show to users unless they can see at least 1 item within that category.
Field Listing
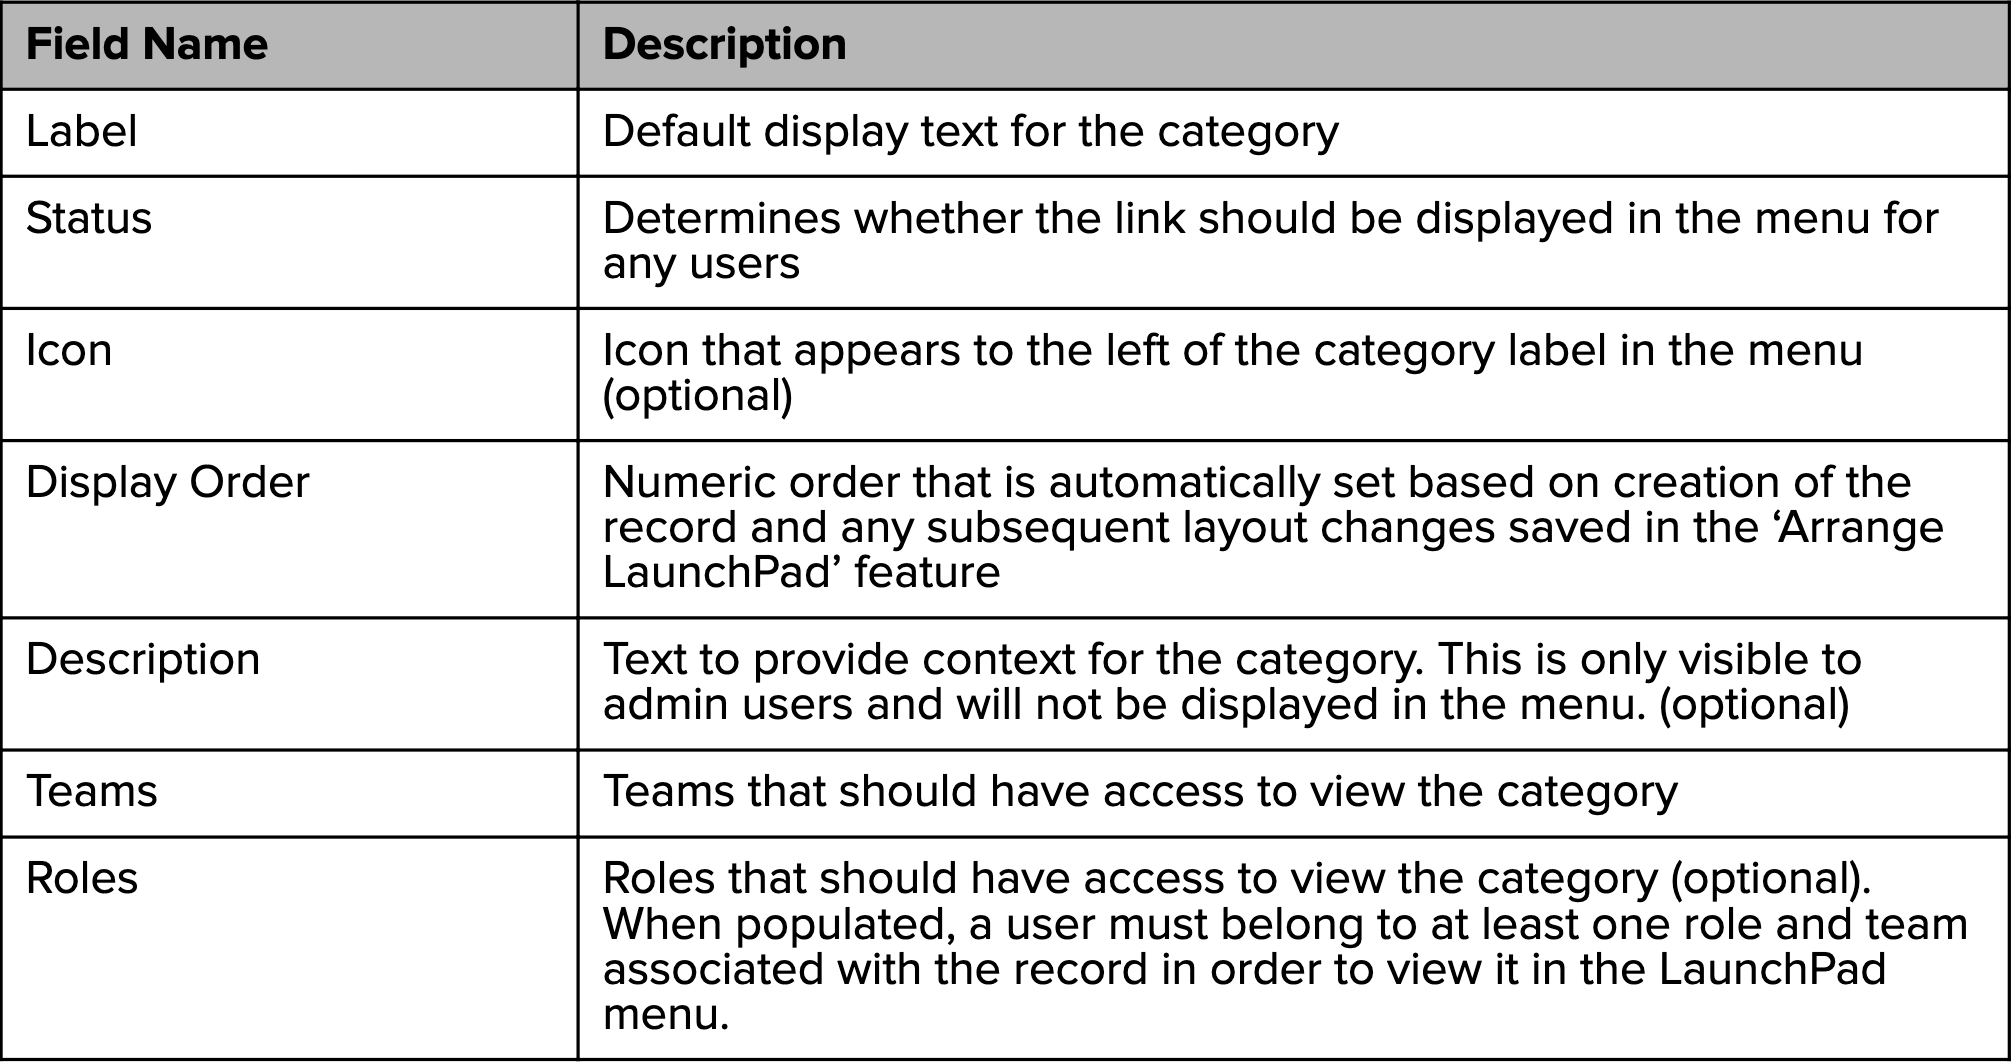
Steps to Create a LaunchPad Category
- Go to Admin > LaunchPad Categories > Create
- Enter a label for the category
- If desired, select an icon and choose the teams and roles for visibility.
- Click ‘Save’

Internationalization
Once you create a LaunchPad category, you have the option to define how that category will appear for users that choose to log into Sugar with the non-default language. Your default language can be found by going to Admin > Locale.
In order to create a localized translation for a LaunchPad category:
- Go to the desired LaunchPad category record view
- Add a record under the LaunchPad Category Languages subpanel
- Create the label in the desired language
- Set the Language dropdown to the desired language
- Click ‘Save’
When a user logs into Sugar using a non-default language, LaunchPad displays the default label you created for any records that do not contain an explicit language translation.
Creating LaunchPad Items
LaunchPad items are links to internal or external resources for your users. In order for a user to have access to a LaunchPad item, all of the following must be true:
- The user has visibility access to the category associated with the item and the category is in an active status.
- The user has visibility access to the item and the item is in an active status.
Field Listing
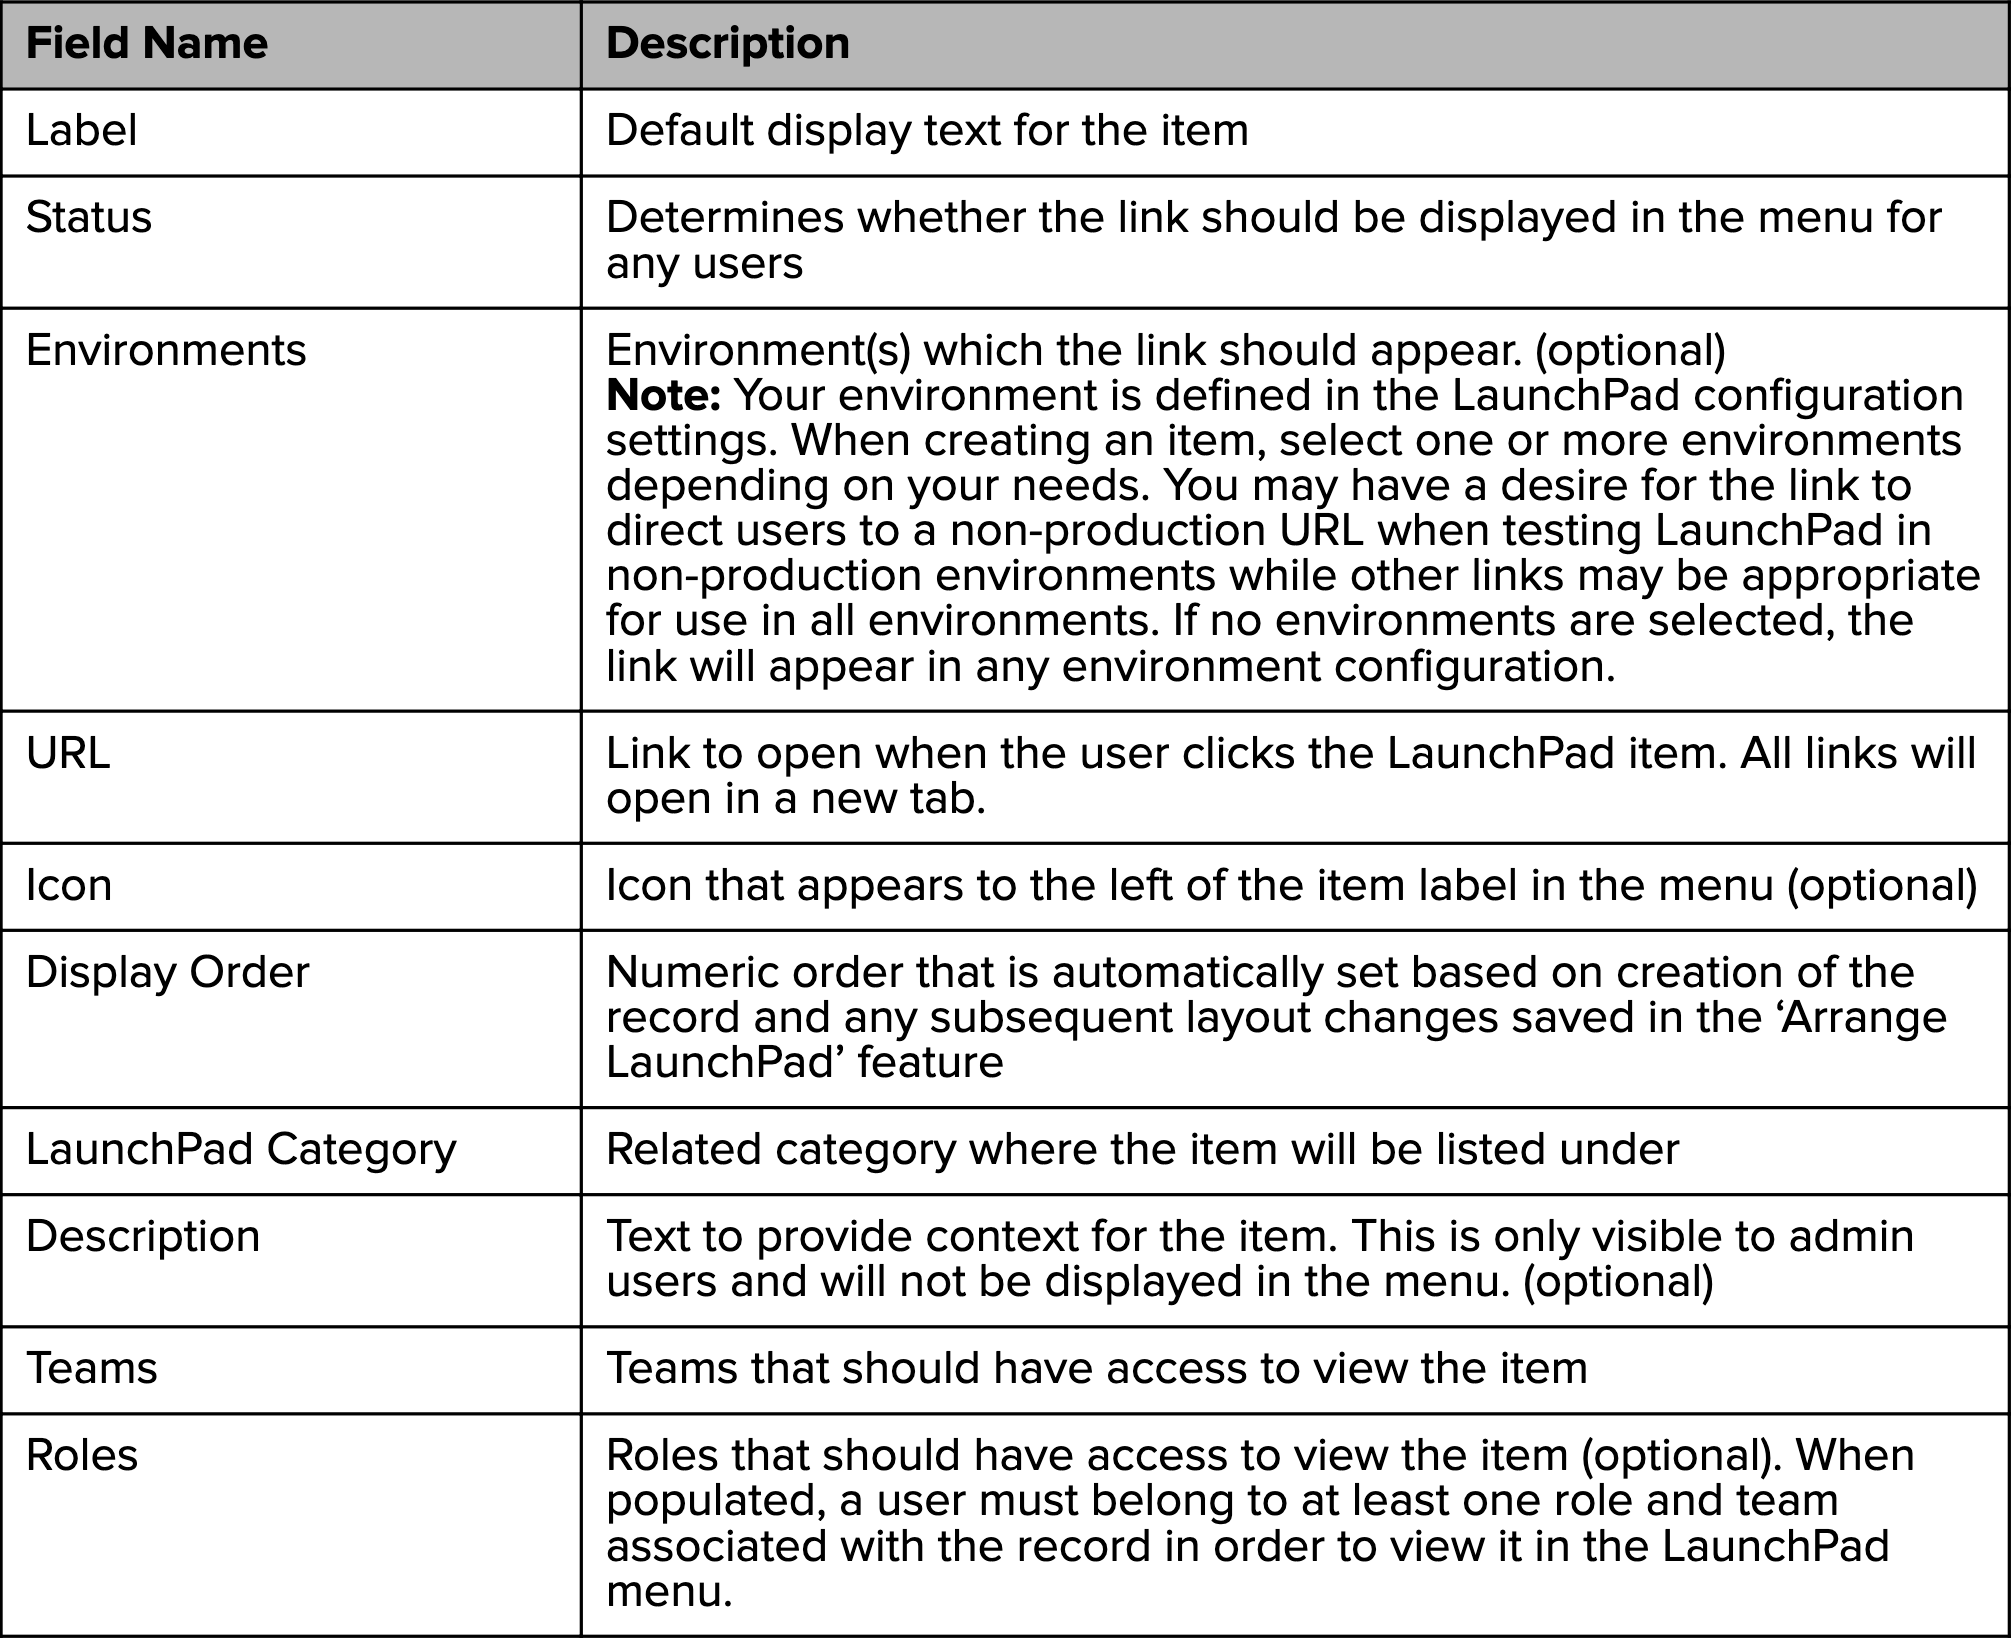
Steps to Create a LaunchPad Item
- Either create an item from the subpanel on the desired LaunchPad Category record view or go to Admin > LaunchPad Items > Create
- Enter a label, URL, and category for the item
- Select which environments this item should appear under.
- If desired, select an icon and choose the teams and roles for visibility.
- Enter a description for reference only. Users will not see this text in the LaunchPad menu.
- Click ‘Save’
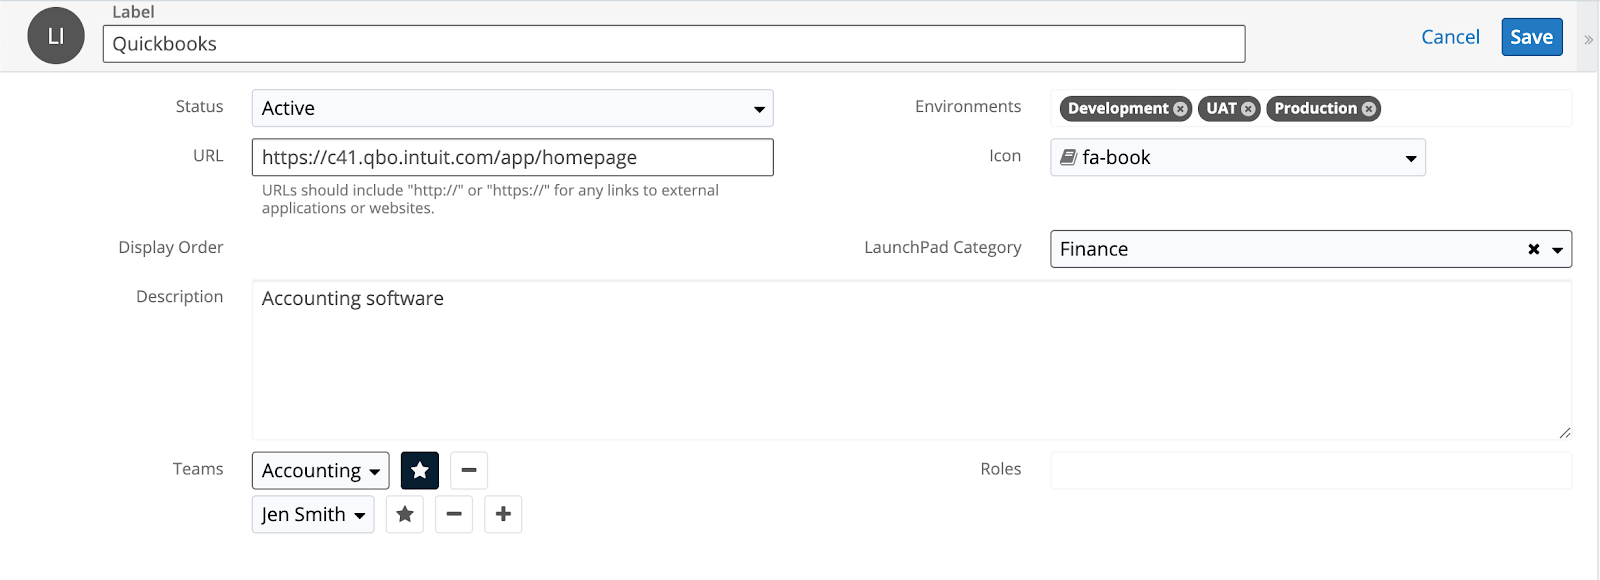
- Refresh the page to see any changes in the LaunchPad menu for your user Note: A refresh is required because the top header bar where LaunchPad is located is loaded statically when first accessing your Sugar instance.
Internationalization
Once you create a LaunchPad item, you have the option to define how that item will appear for users that choose to log into Sugar with the non-default language. Your default language can be found by going to Admin > Locale.
In order to create a localized translation for a LaunchPad item:
- Go to the desired LaunchPad item record view
- Add a record under the LaunchPad Languages subpanel
- Create the label in the desired language
- Set the Language dropdown to the desired language
- Click ‘Save’
When a user logs into Sugar using a non-default language, LaunchPad displays the default label you created for any records that do not contain an explicit language translation.
Arranging LaunchPad
Once you have LaunchPad categories and items created, organize the layout of those items with the Arrange LaunchPad feature:
- Go to Admin > Arrange LaunchPad

- In the next screen you can drag and drop items or categories to the desired position in the menu layout
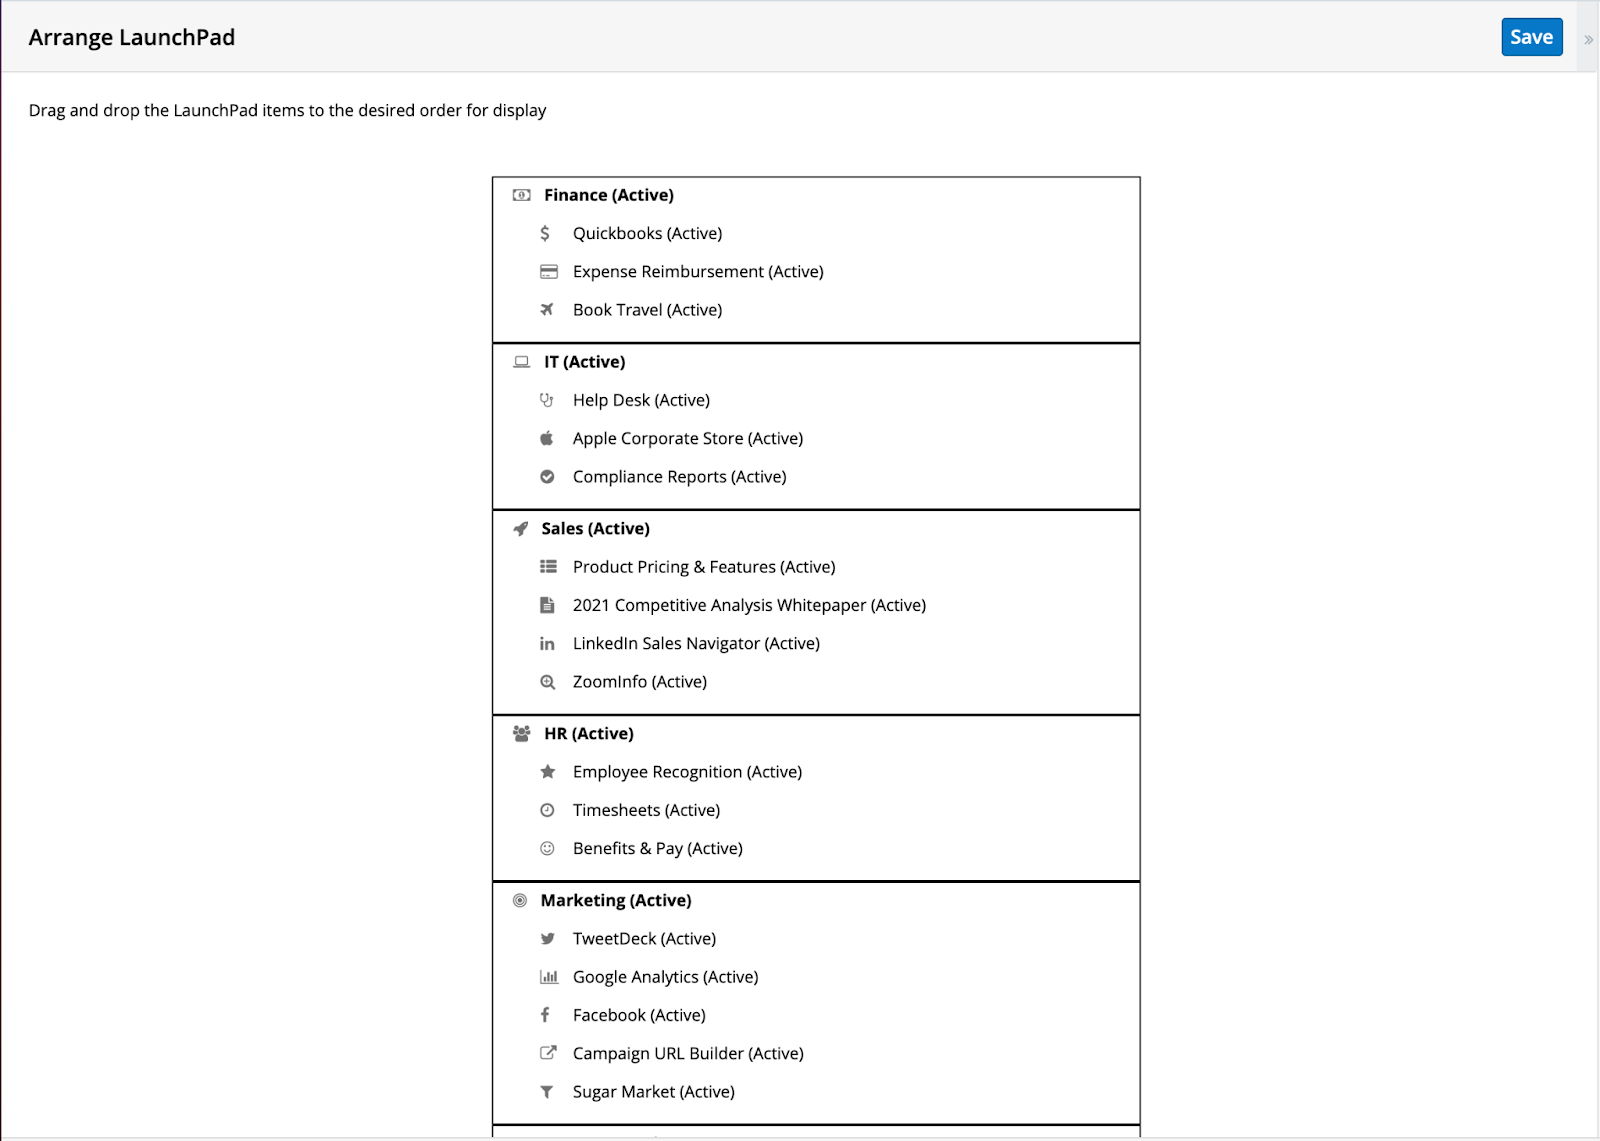
- Click ‘Save’
Uninstalling the Plug-In
Follow the steps below to remove the plug-in from your Sugar instance.
- Log in to your Sugar instance as an admin user
- Go to Admin > Module Loader
- Locate the ‘Upsert LaunchPad’ package in the list of installed packages and click ‘Uninstall’
- Select the desired option for handling the related database tables: a. Do Not Remove Tables - You either want to upgrade the plug-in to a newer release or you want to retain the sudo audit log data. b. Remove Tables - You want all data associated with the plug-in to be deleted and you have no intention of upgrading.
- Click ‘Next’
The uninstall will process and provide a confirmation upon successful completion.


